Conquering the Cloud: A Step-by-Step Guide to Launching Your First AWS EC2 Linux Instance
Intruduction:
I’ve played around with other cloud platforms before, but they felt a bit like cardboard forts — fun for a while, but not exactly sturdy or full of possibilities. AWS, on the other hand, is like a whole theme park of cloud tools, with towering servers, winding networks, and hidden treasure troves of data.And today, I’m tackling my first big climb: building my own Linux EC2 instance. Think of it as my very own cloud cabin, a cozy little space to tinker with code, host websites, and maybe even launch a digital rocket or two.It won’t be easy, of course. There will be mountains of documentation to navigate, rivers of code to cross, and maybe even a few grumpy gremlins guarding the server secrets. But hey, that’s all part of the adventure, right?So, if you’re curious about building your own cloud kingdom, or just want to see a newbie stumble through the process with wide-eyed wonder, come along! We’ll decipher strange acronyms (AMIs, anyone?), wrestle with digital keys (SSH, I’m looking at you!), and maybe even conquer the command line beast together. Who knows, maybe by the end, we’ll both be cloud-surfing pros, building castles in the sky and laughing at the little cardboard forts we used to play in.
Before we embark:
Prerequisites: An AWS account (sign up for a free tier if needed) and an SSH client (PuTTY, OpenSSH).
Target: Amazon Linux 2.
Step 1: Summoning Your Instance:
A. Log in to the AWS Management Console
B. Select your region
Step 2: Open the EC2 dashboard From the AWS management console click on search icon and type EC2 and select dashboard.
Step 3: Launch Instance
Step 4: Name your Instance for easy identification and Choose your AMI
Here the name of our instance is Builder_instance and the number of instance we are provisioning is 1.
Here you choose the Amazon Machine image, in this exercise I choose Amazoon Linux 2023 AMI.
Step 5: Choose the instance type.
Here I choose t2.Micro which is free tier eligible since we are using a free account.
Step 6: Create a key pair
Here created a new key pair called “Builder_kp” (remember, don’t lose it!).
Step 7: Create a security group to control inbound traffic on HTTPs for 0.0.0.0/0 and allows inbound traffic on SSH from your ip address or any ip address, and proceed to click on launch.
Congratulation we have created our Amazon linux instance.
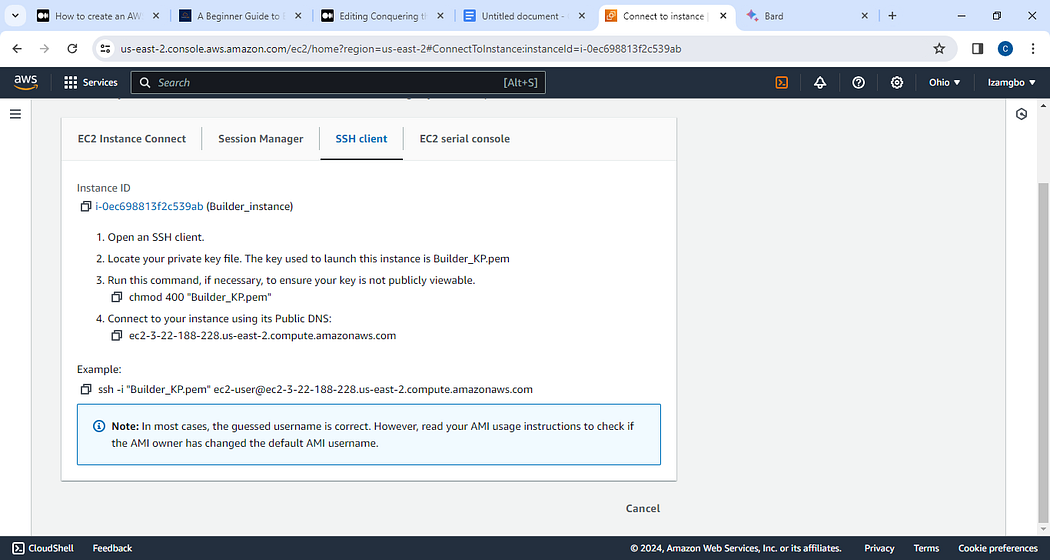
Lets now ssh into our instance by clicking on connect to instance.
Step 8: Connect to instance

Follow the instructions to ssh to your instance

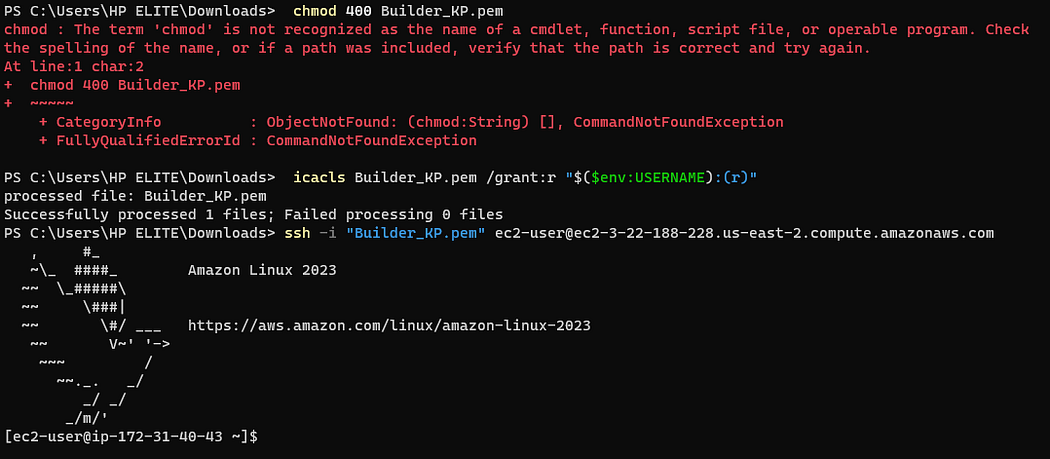
Here I treid using the “chmod” command but its not supported on window powershell, I used the another command “icacls”

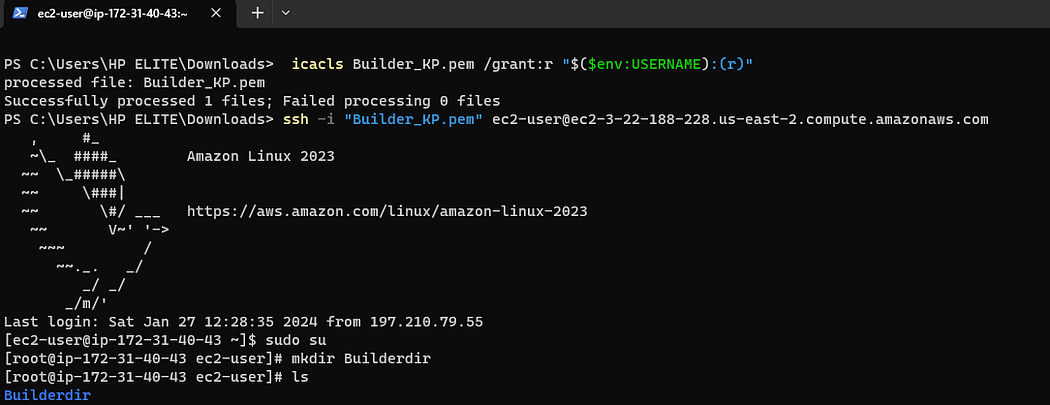
To get to the root I used the sudo su cmd, likewise created my first directory called Builderdir.
And there you have it! Your very first Amazon Linux EC2 instance, ready to launch your digital rockets and build your cloud kingdom.