Elastic Beanstalk in a Nutshell
Elastic Beanstalk is a service provided by Amazon Web Services (AWS) that simplifies the process of deploying and managing web applications in the cloud. It’s like a Platform as a Service (PaaS) that takes care of the underlying infrastructure, letting you focus on building and maintaining your application logic.
Here’s a breakdown of what it does:
Automatic provisioning and configuration: You upload your application code and Elastic Beanstalk takes care of setting up the necessary AWS resources (like servers, databases, and load balancers) to run it.
Simplified deployment: No need to manually configure and manage servers. Just upload your code and Elastic Beanstalk handles the deployment process.
Easy scaling: As your application traffic increases, Elastic Beanstalk can automatically scale the resources up and down to meet demand, saving you money and ensuring optimal performance.
Health monitoring: Elastic Beanstalk continuously monitors your application’s health and automatically restarts instances if they encounter problems.
Think of it this way: Instead of dealing with complex infrastructure setup and management, you can focus on your code and Elastic Beanstalk will handle the rest, making it a good fit for developers who want to quickly and easily deploy their applications on the cloud.
Here are some additional details about Elastic Beanstalk:
Supports various programming languages: Go, Java, .NET, Node.js, PHP, Python, and Ruby are all supported.
Offers different environment types: You can choose from various configurations for development, staging, and production environments.
Cost-effective: You only pay for the resources your application uses.
ILLUSTRATION:
STEP 1: Login to your AWS management console and Create an Application
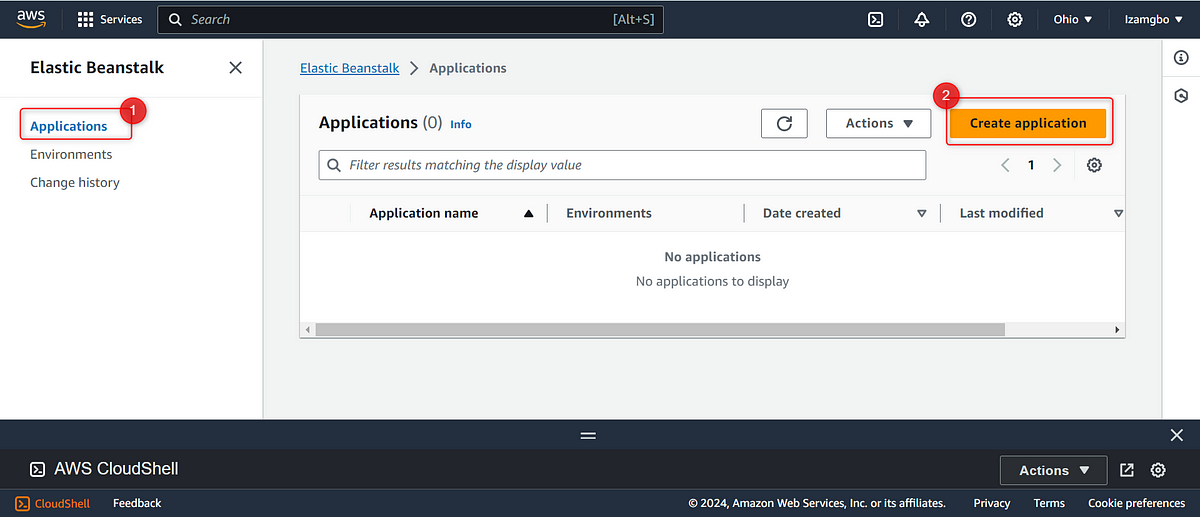
Click on the “Application” and select “create application”
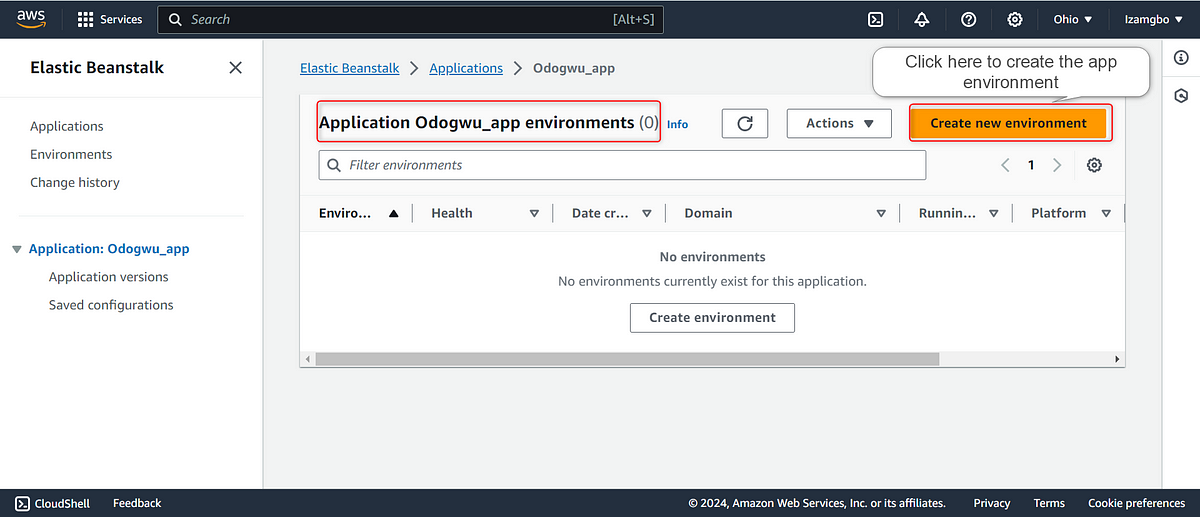
Here I created an application named Odogwu_app*, then proceeded to create a new environment.
*
Step 2: Create an Environment
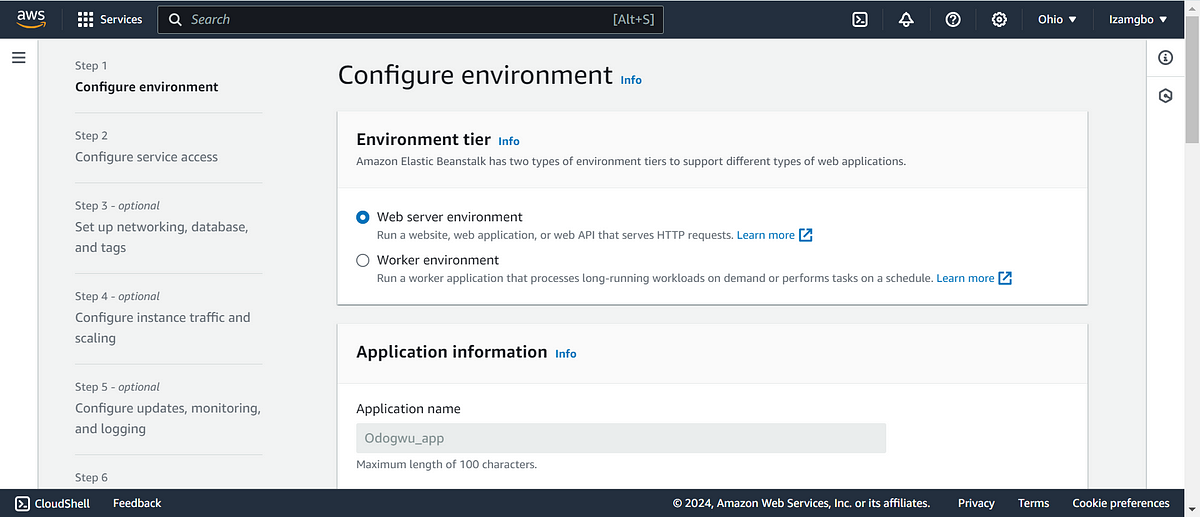
I selected web server environment
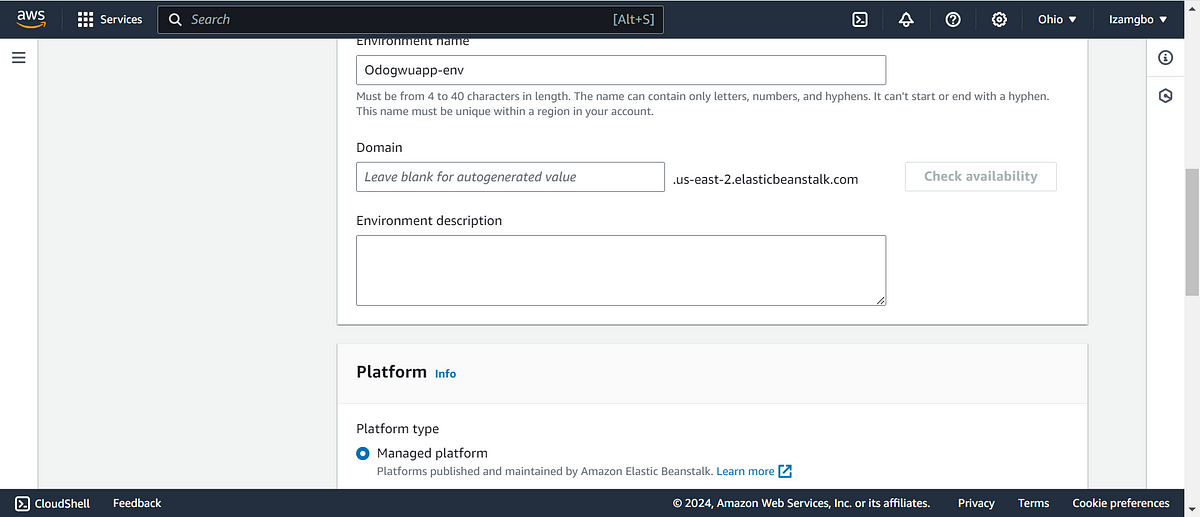
I named the environment Odogwuapp-env and allowed the Domain to autogenerate value.
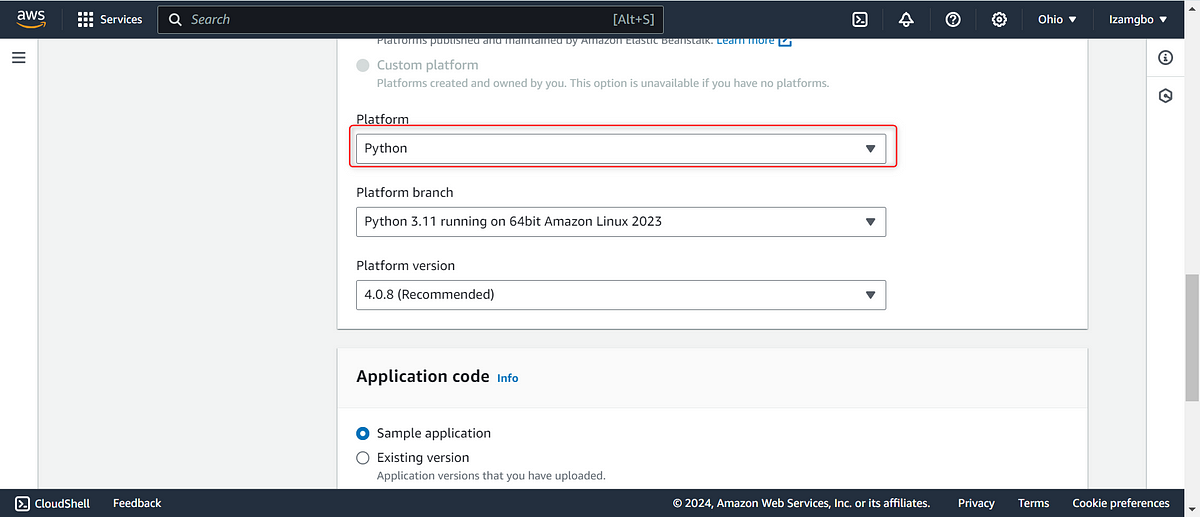
Here I choose Python as my platform
Set up a service role
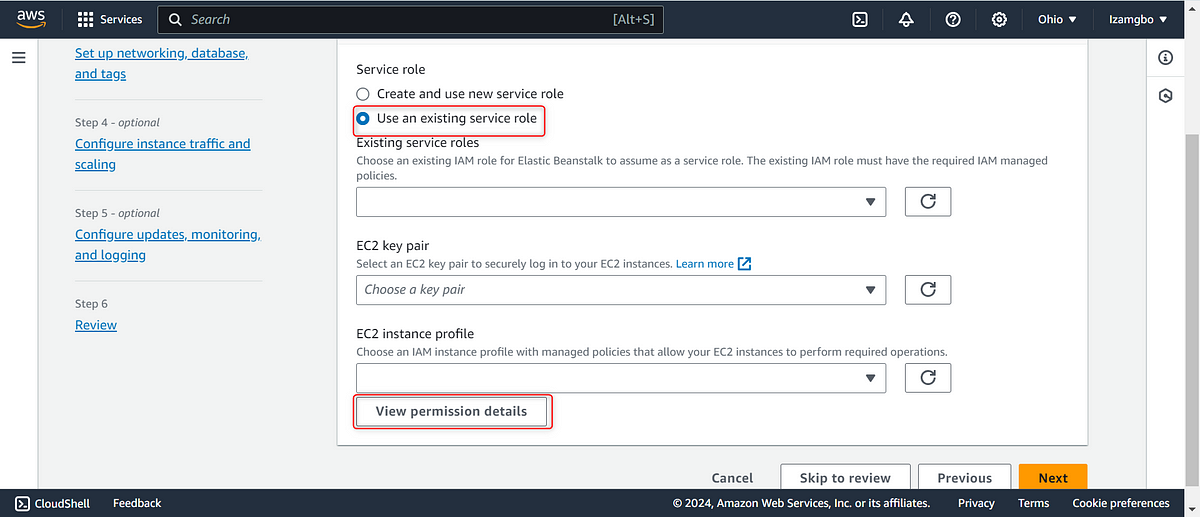
From the above, you will see that I want to use an existing service role.
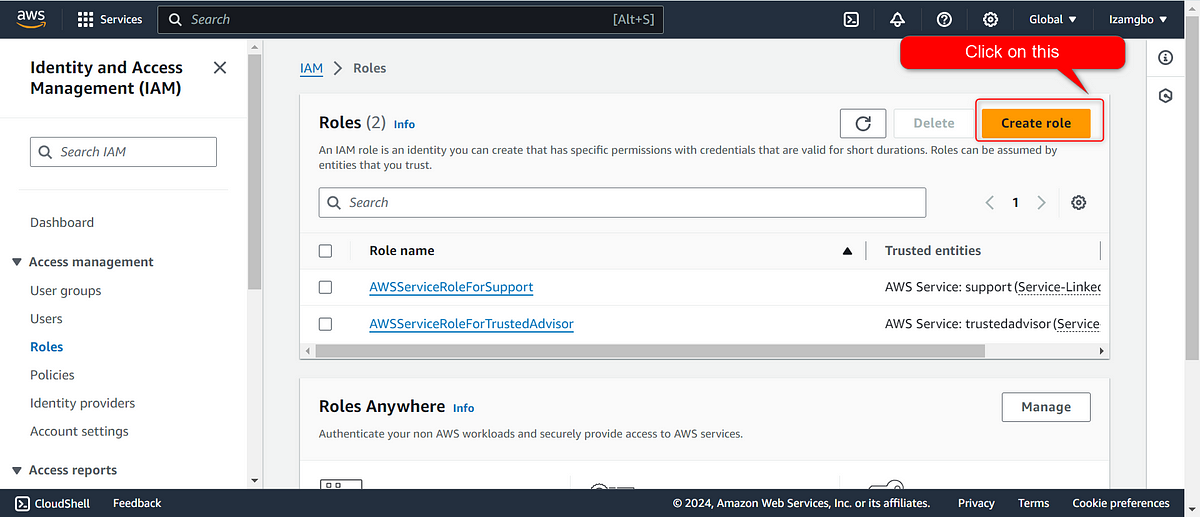
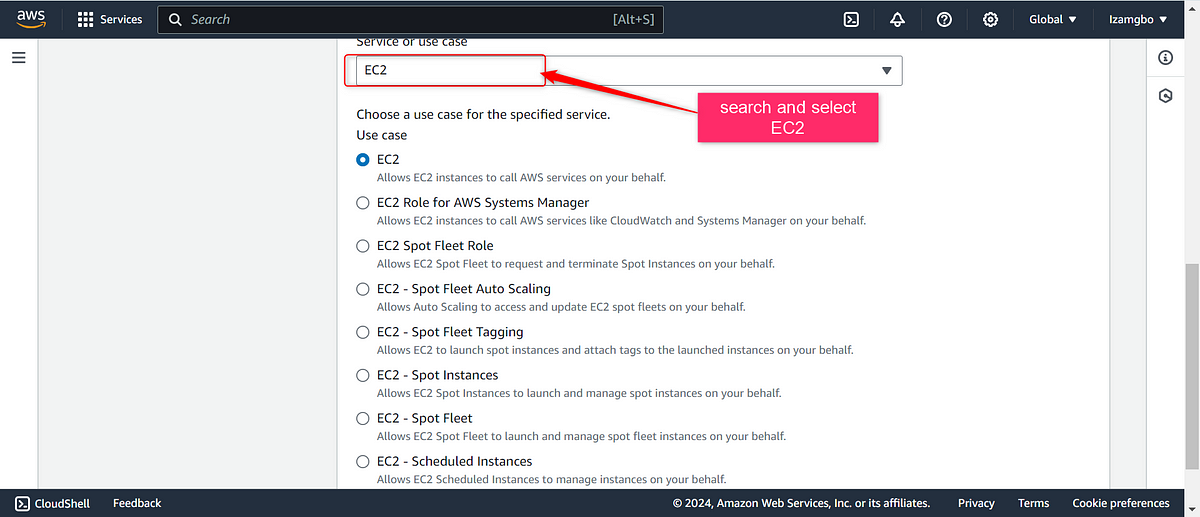
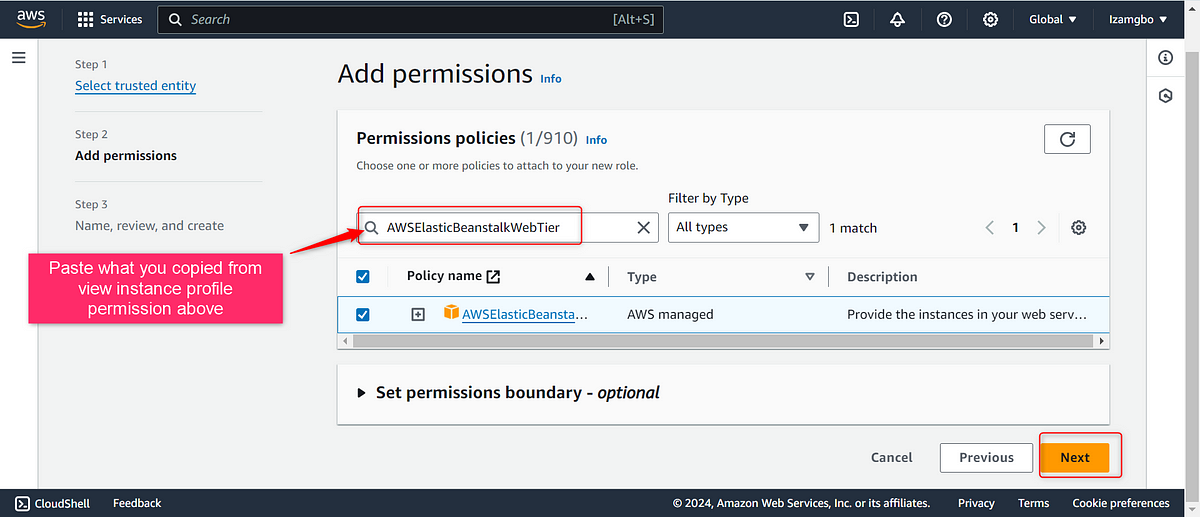
for the sake of this illustration, I will show you how to create a new service role. click on “view permission detail” *as shown on the above”
*
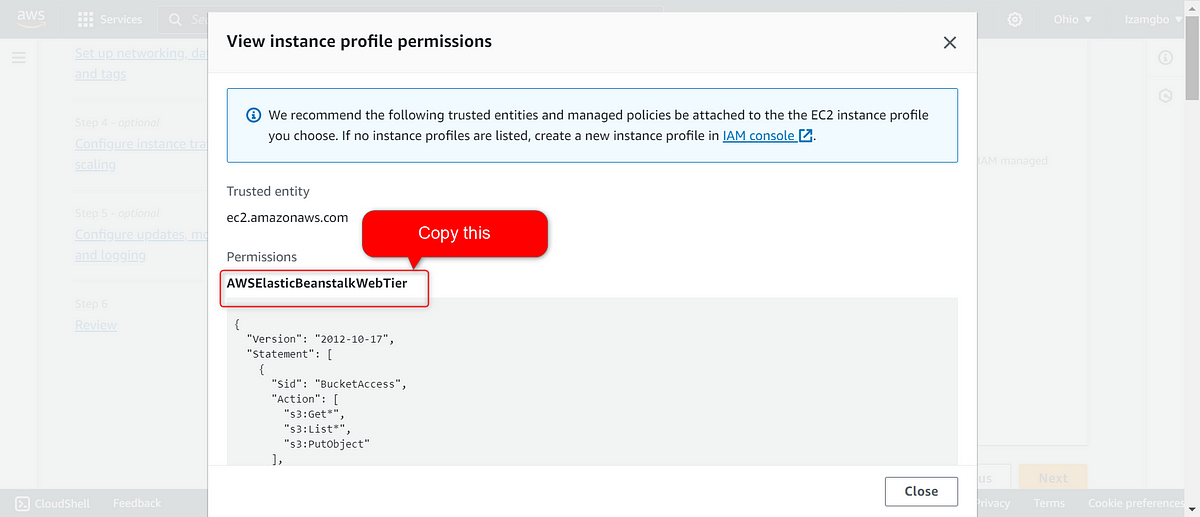
view instance profile permission
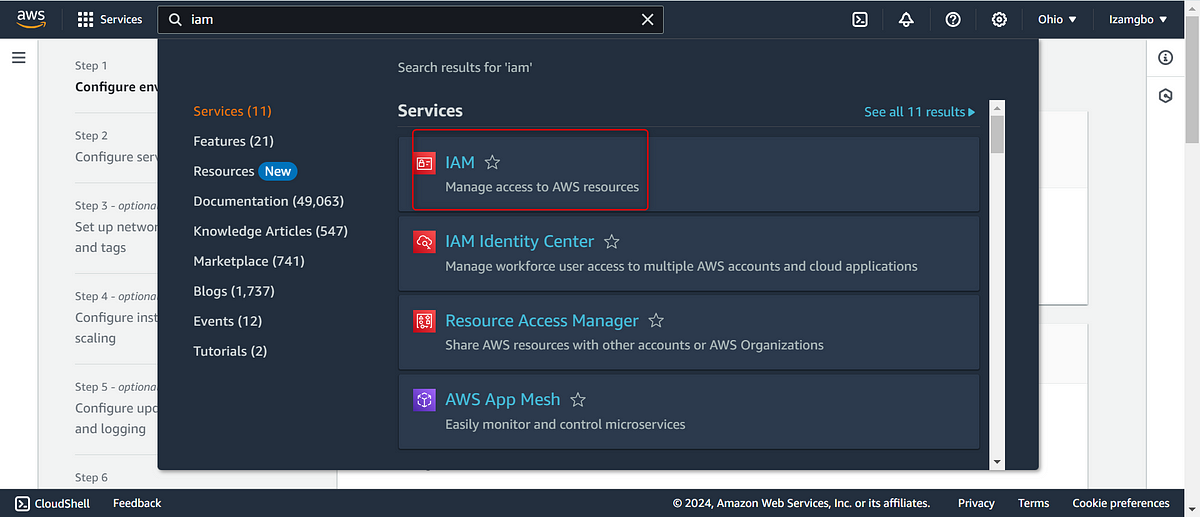
Go ahead to duplicate the current page and search IAM (Identity Access Management).
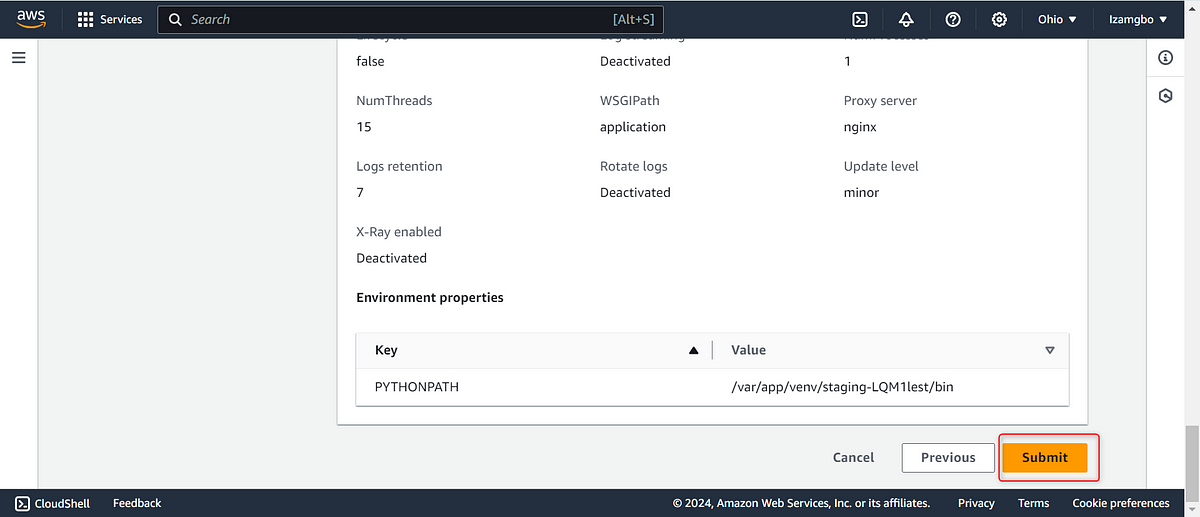
Review and submit
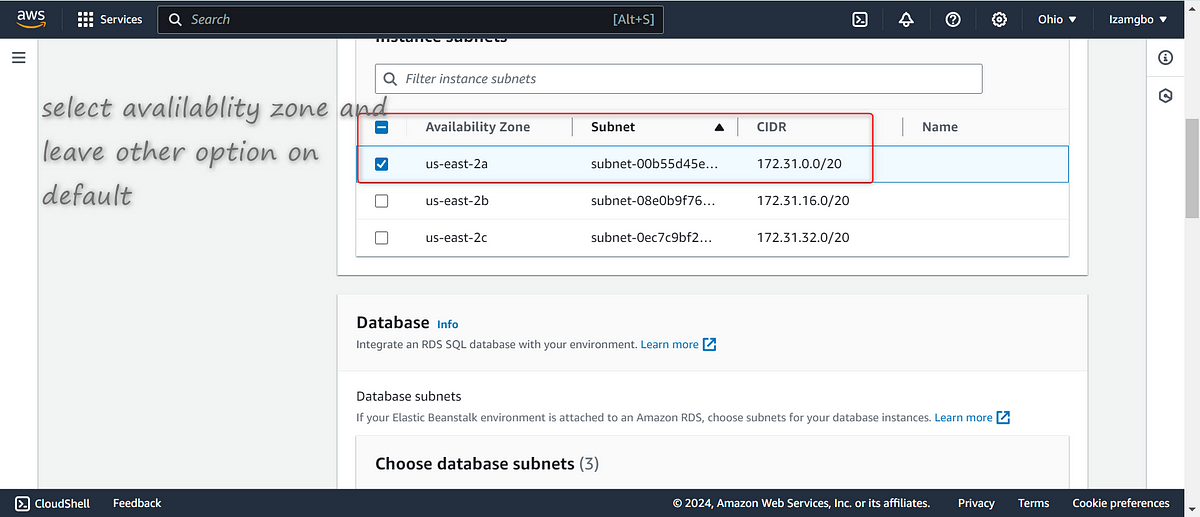
Go back to the environment page and complete the creation the proceed to submit.
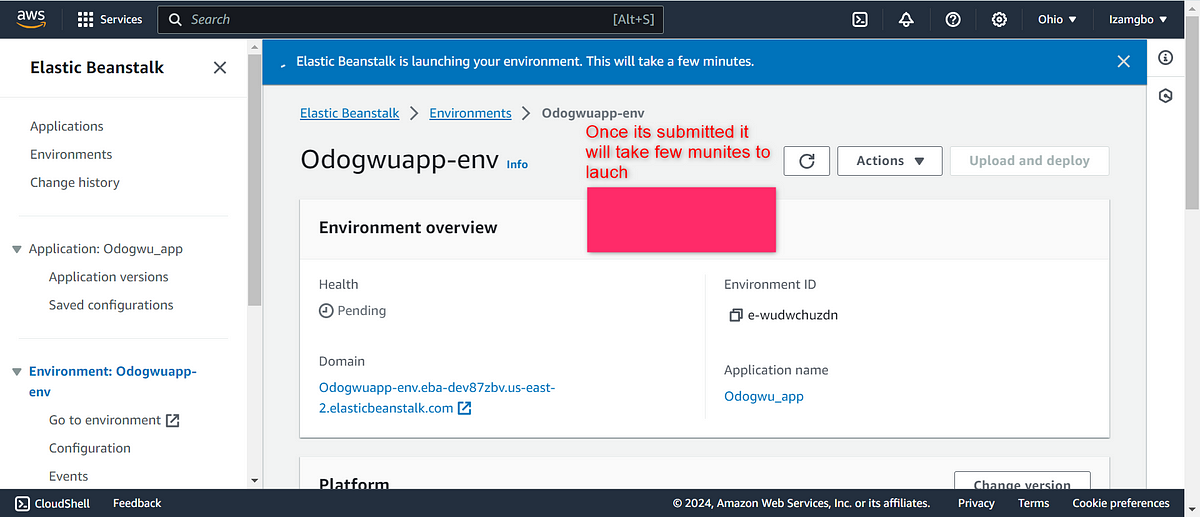
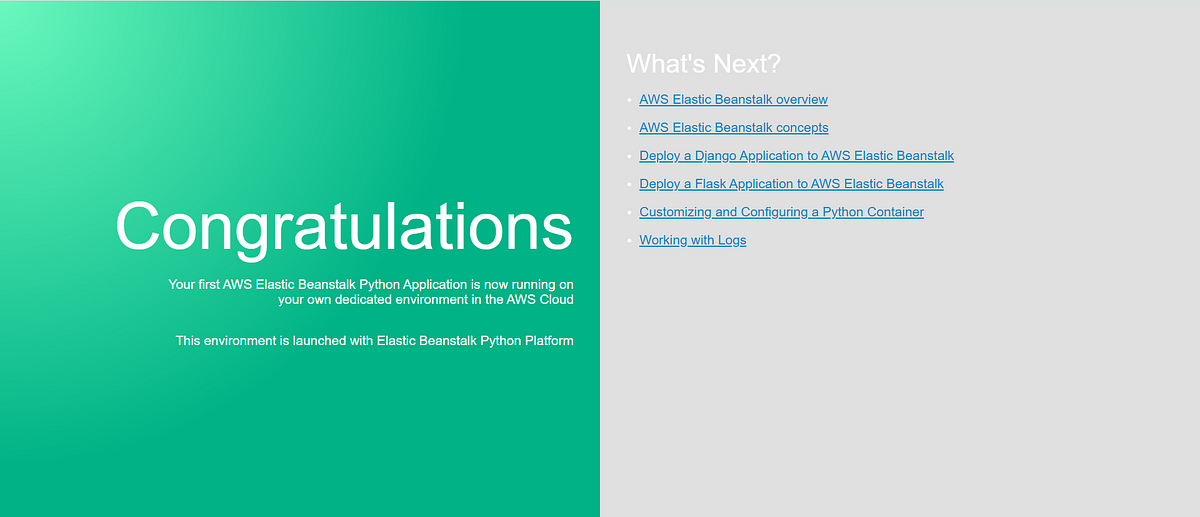
Congratulations your first Elastic Beanstalk Python application is now running on your environment.
Sure, here is a practical blog post on mastering AWS Elastic Beanstalk in 5 easy steps:
Mastering AWS Elastic Beanstalk in 5 Easy Steps
AWS Elastic Beanstalk is a popular platform for deploying and managing web applications in the cloud. It's easy to use, scalable, and cost-effective, making it a great choice for developers of all levels.
In this blog post, we'll walk you through the five easy steps of mastering AWS Elastic Beanstalk:
1. Create an AWS Account
If you don't already have one, you'll need to create an AWS account. You can do this for free, and it will give you access to all of the AWS services, including Elastic Beanstalk.
2. Create an Application
Once you have an AWS account, you can create an application in Elastic Beanstalk. This is where you'll define your application's settings, such as the environment, platform, and version.
3. Create an Environment
An environment is a running instance of your application. You can create multiple environments for different purposes, such as development, staging, and production.
4. Configure Your Environment
Once you have an environment, you can configure it with the settings you need for your application. This includes things like the instance type, security groups, and environment variables.
5. Deploy Your Application
Finally, you can deploy your application to your environment. Elastic Beanstalk supports a variety of deployment methods, including uploading code, using Git repositories, and deploying from Amazon S3.
Bonus Tips:
Use the Elastic Beanstalk console to manage your applications and environments.
Use the Elastic Beanstalk CLI to automate your deployments.
Monitor your applications with CloudWatch to ensure they're running smoothly.
Scale your applications up or down as needed with Elastic Beanstalk's auto-scaling feature.
By following these five easy steps, you'll be well on your way to mastering AWS Elastic Beanstalk. With its ease of use, scalability, and cost-effectiveness, Elastic Beanstalk is a great choice for deploying and managing your web applications in the cloud.
Additional Resources:
AWS Elastic Beanstalk Documentation: https://docs.aws.amazon.com/elastic-beanstalk/
AWS Elastic Beanstalk Tutorial: https://docs.aws.amazon.com/elasticbeanstalk/latest/dg/GettingStarted.html
AWS Elastic Beanstalk CLI: https://docs.aws.amazon.com/elasticbeanstalk/latest/dg/eb-cli3.html
I hope this blog post has been helpful. If you have any questions, please feel free to leave a comment below.

